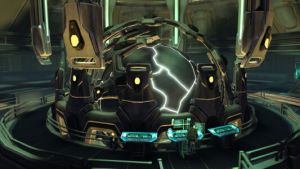
The IRW Aylhr has 68 primary decks.
Beak Component
- Deck 1: Communication's Array, Shield Emitters
- Deck 2: Communications Control Room, Shield Emitter Access
- Deck 3: Electrical access, Life Pod Cluster
- Deck 4: Workbee & Repair Drone Room
- Deck 5: Leih's Quarters [Plus Secondary Room & Personal Computer Core] & RS Quarters, Command Lounge
- Deck 6: NS (Political Officer) Quarters, VIP Quarters, VIP Recreational Rooms
- Deck 7: Senior Officers Quarters
- Deck 8: Officers Quarters
- Deck 9: Officer Quarters, Officers Mess, Officers Library
- Deck 10: Officers Gym, Officers Holodeck
- Deck 11: Crew Deck 1 (Lower Non-Officer Quarters), Secondary Armory
- Deck 14: Crew Deck 4 (Lower Non-Officer Quarters), Transporter Room
- Deck 15: Crew Deck 5 (Lower Non-Officer Quarters), Secondary Infirmary
- Deck 18: Crew Deck 8 (Lower Non-Officer Quarters), General Crew Mess
- Deck 23: Crew Gym, Crew Library
- Deck 24: Auditorium, Crew Holodeck
- Deck 25: 12 Prisoner Holding Cells, Interrogation Rooms, Main Security Office
- Deck 26: 4 Special Isolation Cells, Security Training Center, Secondary Armory
- Deck 27: Navigational Sensor Control
- Deck 28: Environmental Control, Life Support Control
- Deck 29: Main Disruptor Array Access, Auxiliary Targeting Systems
- Deck 30: Tal'Shiar & Tal'Diann Liaison Offices, Main Disruptor Array Access
- Deck 31: Main Computer Core, Main Battery
- Deck 32: Main Armory, Bridge, Leih's Office, Briefing Room
- Deck 33: Main Transporter Room, Life Pod Cluster
- Deck 34: Main Infirmary, Surgical Suites, Recovery Rooms, ICU, Diase'Hiifvehi (CMO) Office
- Deck 35: Medical Isolation Rooms, Medical Diagnostic Labs, Misc Medical Labs, Medical Offices
- Deck 36: Stellar Cartography, Astrometric, Research Library
- Deck 37: Primary Science Labs, Science Offices
- Deck 38: Containment & Clean Rooms, Secondary Science Labs
- Deck 39: Equipment Storage, Cargo Rooms, Machine & Tool Shop
- Deck 40: Repulse Cannon Port, Primary Targeting Systems
- Deck 41: Repulse Cannon Port, Forward Ammo Magazine, Torpedo Bay
- Deck 42: Repulse Cannon Port, Power Relay Cluster
- Deck 43: Gai'Shian (Marine) Mess, Gai'Shian Meeting Room
- Deck 44: Gai'Shian Drill & Training Area, Troop Transporter
- Deck 45: Gai'Shian Barracks
- Deck 46: Gai'Shian Barracks
- Deck 47: Gai'Shian Barracks
- Deck 48: Gai'Shian Barracks
- Deck 49: Auxiliary Environmental Controls, Auxiliary Life Support
- Deck 50: Waste & Sewer System
- Deck 51: Workbee & Repair Drone Room, Parts Storage
- Deck 52: Modular Cargo Sections
- Deck 53: Modular Cargo Sections
- Deck 54: Modular Cargo Sections
- Deck 55: Modular Cargo Sections
- Deck 56: Modular Cargo Sections
- Deck 57: Modular Cargo Sections
- Deck 58: Modular Cargo Sections, Life Pod Cluster
- Deck 59: Auxiliary Security Station, First Aid Station, Secondary Armory
- Deck 60: Attack Drone Control Room, Drone Pilot Ports
- Deck 61: Secondary Hangar Bay
- Deck 62: Secondary Hangar Bay
- Deck 63: Secondary Hangar Bay
- Deck 64: Secondary Hangar Bay
- Deck 65: Primary Cargo Storage
- Deck 66: Primary Cargo Storage
- Deck 67: Main Cargo Bay
- Deck 68: Main Cargo Bay, Cargo Transporters
Upper Neck Component
The Upper Neck of the Aylhr is heavily armored due to critical power relays located there.

- Deck 1: Water Reclamation System, Upper Water Reservoir
- Deck 2: Hydroponic Labs, Lower Water Reservoir
- Deck 3: Water Transfer System, Garden Environmental Control System, Holographic Control System
- Deck 4: Gardens Deck 1
- Deck 5: Gardens Deck 2
- Deck 6: Gardens Deck 3
- Deck 7: Gardens Deck 4
- Deck 8: Gardens Deck 5
- Deck 9: Gardens Deck 6
- Deck 10: Gardens Deck 7
- Deck 11: Gardens Deck 8
- Deck 12: Gardens Deck 9
- Deck 13: Gardens Deck 10
- Deck 14: Gardens Deck 11
- Deck 15: Gardens Deck 12
- Deck 16: Auxiliary Power Relay Corridor
- Deck 17: Auxiliary Power Relay Corridor
- Deck 18: Auxiliary Power Relay Corridor
Lower Neck Component
The Lower Neck of the Aylhr is heavily armored. It is the primary artery of power distribution between the engineering section and the ship's beak.
- Deck 1: Modular Cargo Sections
- Deck 2: Modular Cargo Sections
- Deck 3: Primary Power Corridor
- Deck 4: Primary Power Corridor
- Deck 5: Primary Power Corridor
- Deck 6: Primary Power Corridor
- Deck 7: Primary Power Corridor
- Deck 8: Primary Power Corridor
- Deck 9: Module Cargo Sections
- Deck 10: Modular Cargo Sections
Rear Component

- Deck 1: Modular Cargo Sections
- Deck 2: Modular Cargo Sections
- Deck 3: Modular Cargo Sections
- Deck 4: Modular Cargo Sections
- Deck 5: Modular Cargo Sections
- Deck 6: Secondary Infirmary
- Deck 7: Security Office, Secondary Armory, 4 Small Holding Cells
- Deck 8: Engineering Quarters, Engineering Mess, Life Pod Cluster
- Deck 9: Computer Core Backup, Daise'Paectum Office, Engineering Labs
- Deck 10: Main Engineering Deck 1, Power Distribution Relays
- Deck 11: Main Engineering Deck 2, Power Distribution Relays
- Deck 12: Main Engineering Deck 3, Quantum Singularity Drive
- Deck 13: Main Engineering Deck 4, Quantum Singularity Drive
- Deck 14: Main Engineering Deck 5, Quantum Singularity Drive
- Deck 15: Main Engineering Deck 6, Quantum Singularity Drive
- Deck 16: Main Engineering Deck 7, Power Distribution Relays
- Deck 17: Main Engineering Deck 8, Power Distribution Relays
- Deck 18: Main Engineering Deck 9, Twin Tandem Frictionless Drive
- Deck 19: Main Engineering Deck 10, Twin-Tandem Frictionless Drive
- Deck 20: Ship's Batteries, Auxilary Power Relay
- Deck 21: Cloaking Control System, Shroud Control System
- Deck 22: Emergency Life Support Systems
- Deck 23: Modular Cargo Sections
- Deck 24: Workbee Room, Parts Storage
- Deck 25: Rear Torpedo Bay, Rear Ammo Magazine, Auxiliary Targeting Systems
- Deck 26: Parts Storage, Weapons Storage
- Deck 27: Main Hangar Bay
- Deck 28: Main Hangar Bay
- Deck 29: Main Hangar Bay
- Deck 30: Main Hangar Bay
- Deck 31: Main Hangar Bay
- Deck 32: Main Hangar Bay
